Wednesday 31 December 2014

Memory Lane Cards of 2014

Thank you for joining me on the Eve of 2015 ! I thought I would look back on a few cards I made extra, and share some different technique's I used. Have a BLESSED, SAFE NEW YEAR my friends!

Monday 29 December 2014

C.C. Design's NEW RELEASE DIES....Awesome!

Welcome back! I received a C.C. Design order this morning. I thought I'd share the NEW DIEzyne Dies that C.C. Designs came out with. I will post some video's using them tomorrow. Please enjoy this small haul!

Gift Exchange on STAMP NATION

Well, it's been awhile since I ventured into my Craft Room! Thank you for dropping by. I will be posting a few more video's today. I pray everyone had a Blessed CHRISTmas, and will be enjoying the last few days of 2014! Doesn't seem possible that a whole year has gone by so quickly! Here is a video showing a gift exchange we shared over on STAMP NATION! Please enjoy.

Tuesday 23 December 2014

MISTI REVIEW

Well, CHRISTmas is approaching, and the CHRISTmas Cards have ceased. Another year has quickly passed, as we approach 2015! Wow, doesn't seem possible that 2014 is almost over. I thought I'd take out my MISTI, and see how it works. I did 15 cards this afternoon, 5 tags, and 15 envelopes to match the cards I made! Check this MISTI out. I think you'll agree with me, that it's well worth the money!

Monday 22 December 2014

HAUL VIDEO

Thanks for dropping by today. Here are three orders that arrived in the last few days. Please enjoy!

Overhead Camera Video Setup

Welcome to my craft room. I finally got my Camcorder to fit on this wonderful overhead system I came up with. Very affordable, and amazingly sturdy to hold your camera in place overhead!

Friday 19 December 2014

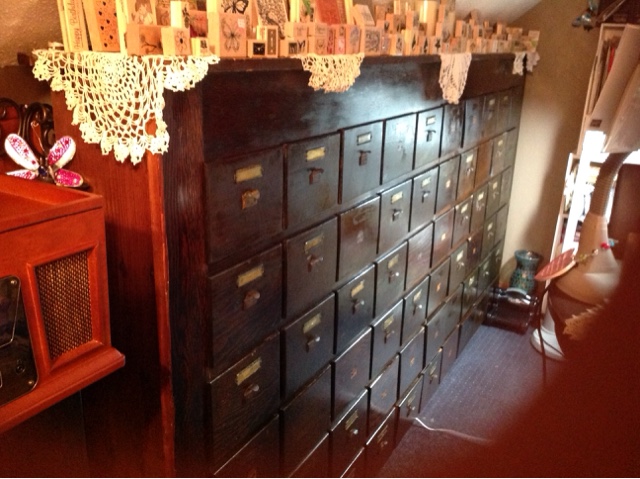
My FIRST ATTEMPT at organizing my EMBOSSING FOLDERS!

Sorry, I just noticed my first attempt at the STORAGE IDEA was not posted! Here is what I came up with yesterday! Smiles

UPDATED VERSION of my original idea.

Welcome to my craft room. I couldn't rest with the original idea of just having an envelope as a holder for my Embossing Folders. One main reason was the flimsy nature of just having paper to hold the folders. I like having a substantial amount of weight to them, when leafing through them continually, trying to find a folder. I came up with this NEW IDEA, and I think they look AMAZING. Tell me what you think! I have cut out all the chipboard, and will be working on these every evening, until completed! I will post them here when they are COMPLETED! I can't wait to show you! Oh yes, I now have storage on the back, that will hold 10 embossed pages comfortably.

Wednesday 17 December 2014

Reversed Copic Shaker Card....Part 2 of 2

Thank you for joining me for Part 2 of 2 today! I also showed you some awesome Vellum Stenciling Technique's, which are quick, and beautiful. I love using Vellum to make Shaker cards, and there are many ways to decorate the vellum, other than stamping! Enjoy.

Reversed Copic Shaker Card Part 1 of 2

Welcome to my Craft Room. This evening I wanted to make a card using the Spellbinder Die from a previous order. I thought because it has progressed size holes, it would make a great background for a fish style card. You know what happens as I start adding GOLD, and SIVER, well, my fish idea turned into FLOWERS...LOL! This is a 2 part video, as my camera shut off 3/4 of the way through! It is a pretty card, if you can endure watching another part, that will complete it!...smiles...Enjoy

Thursday 11 December 2014

A very small Haul, and the completion of my lampshade.

Welcome to my Craft Room. I did some work on my lampshade today. It was refreshing, getting back into my room for some fun crafting today. Although this video did not capture the completion of this lampshade, it did show my plans to finish it today! I'll post a pic when I finish it this evening. Thanks for viewing!

Wednesday 10 December 2014

Thank you for letting me share my space with you.


Thank you for joining me today. This is one of my favourite cards I made when I first started my card adventure a few years ago. I did a few different colours, and found this picture tonight, so I wanted to share it with you. I did a complete Craft Room Clean, and Organize last week! I removed everything I could get out, then organized what I could, then put it all back! My BFF came Tuesday, and we began this OVERWHELMING JOB! I had things piled ceiling to floor in our bedroom, which is next to my Craft Room. What a mess! I never thought I'd get it back to working order. Lol...We worked hours, and hours to try and bring it down to a more functional, not so crammed, Craft Space...haha. I continued working after she left on Thursday. I worked 7 hours that night, 15 hours on Friday. Our grandchildren came for a 2 night sleep over Friday until Sunday. I worked most of the day on Saturday, with help from Olivia, my crafting partner. I replaced my 6 ft. round dining room table, where I crafted, with an L shaped GLASS desk at regular height. I am able to use my wonderful leather office chair my hubby bought me last year. I couldn't use it for crafting, because the dining room table height wouldn't allow it! I used it at my sewing table, where I didn't sew...lol....EVERYTHING has changed, and I mean EVERYTHING! I can't find a thing...lol...It is all ORGANIZED LOST! I bought 2 ( 9, 12x12 cube ) Expidet's, which I filled quite easily....I haven't had time to craft at all, since this wonderful makeover....My BFF filled over half of my Apothecary drawers with RIBBONS!!! I could not believe I had over 30 drawers full to capacity of RIBBONS. She seperated every colour, and I'm in the process of caligraphying (is that a word)???? Lol...each name to slide into the metal tag fronts. I have 10 drawers filled with acyilic paints, and 17 drawers left to fill. I think that makes 60 drawers! This Apothecary takes up almost my entire wall, longest wall I might add, in my room.  I deal with those slanted ceilings too! Yikes, what a massive undertaking. It wouldn't be as bad if my room was larger. I think it measures 12x16...something like that, not sure on the exact measurements. All I know is I have enough junk to fill a room 3 times this size, and it's crammed into my space! I will never complain, because I used to craft from the island in my kitchen, for over a year. To have my own room, no matter the size is a BLESSING! I have one single bed, for when my grandchildren sleep over, 2 Expidites, a 3 tier floor to ceiling punch unit, that houses over 240 punches, one 10 drawer cabinet for stamps, a 6 foot cabinet for my papers, and drawers and shelves for embellishments, 2 units that each fit 200 CD Stamp Cases, a sewing table, 12 tier rack for my 12x12 papers, 2, 6 shelf units, an L Shaped desk, a unit that houses my 6x6 paper pads, a 12 drawer unit i house STUFF, a unit that houses my glue guns, embossing powders etc, and 8 stacked 14x14 white boxes I house my flowers, an antique sewing machine in its original cabinet, and my brand new touch screen sewing machine, last but not least my leather chair! Phew....UNBELIEVABLE! Well, my friends, this is the reason for me being MIA this last week, and a half. I will be posting again tomorrow, if all goes as planned! Thank you for your patience. God Bless

Monday 1 December 2014

Creating ART, on our MAILING BOXES this CHRISTmas

Thank you so much for joining me today......I'm beginning the BROWN PAPER ART WORK, for my CHRISTmas boxes that are ready for mailing....I think that I enjoy the creative part of the mailing packages, as much as wrapping them for friends, and family....I sing, and sing, have my OVALTINE, and create, then sing some more...smiles...The Love of my JESUS, makes my creative time more JOYOUS, because I'm giving, without any strings attached to get back! I think of the Scripture, where it says, REJOICE in the Lord ALWAY, and again I say REJOICE! GIVING IS A LEARNED BEHAVIOUR, that my sweet Mom tried to incorporate in us from an early age. You are taught to give. As a child, we want, more than we want to give....We can see that today...If one sibling gets a gift, and opens it, then finds out its not for them, and they have to give it to the rightful owner...they are clinging onto it, as the owner is ripping it from their grasping little hands...lol..The crying starts....and so on, because young children look at things, and their WANTER list is way up there....
If you look back at movies from the past, like my favourite, the original "LITTLE WOMAN", they were taught to give, with a sincere heart to please the other person, and not themselves, right? I just watched it, with Judy Garland, LOVE that movie, and I'm not a movie person....What about  ANNA AND THE KING, with JODY Foster...I cried my eyes out! Gone with the Wind, my ultimate cry fest!.....lol...Why I'm on this Rabbit Trail, I'll never know....I AM JUST SAYING, TEACH OUR CHILDREN TO GIVE, WITH NOTHING IN RETURN !....set a week out to make, and wrap gifts for your Nursing Homes, and let them deliver it themselves, so they can see the gratitude in the Senior's eyes, that brings back HAPPY MEMORIES they may not have anyone to share them with.....
I take our grandchildren to the Senior Homes, with a Hymn Book, and we sing, while one person will volunteer to play the piano...REJOICE....GIVE....and you will building MEMORY BLOCKS, frome one generation, to another....Bookmarks are easy for children, teens, and us, to make for people. Cultivate GIVING, and your reward will be GIVING children, grandchildren...and so on! It starts with my all time QUESTION, I ask our grandchildren when we are TOGETHER......Hey kids, what are we doing right now???...WHAT NANA.??? WE ARE BUILDING A MEMORY! I get them every time....lol..lol..this is the reason I "EXTRA MILE" my parcels....so, my grandchildren will see, and remember what I tell them constantly..."THAT EXTRA MILE, BRINGS ON A SMILE! THANKYOU Mom, for taking time from your day, to be an example of a caring, loving, others oriented Mother! I can hear you now.....Carol, THAT EXTRA MILE, BRINGS ON A SMILE! God Bless, as we prepare to GIVE, wanting NOTHING in return!

Friday 28 November 2014

A Mailing Tip, and a "CLEAN and SIMPLE" Card!

Thanks so much for joining me today. I have been very busy wrapping gifts, finishing a few projects, and trying to keep a sinus migraine at bay! Smiles Our daughter-in-law had us over for a wonderful dinner, so I didn't have to cook tonight....yay! It was an amazing meal, and I'm  "fed up", and a tad bit tired, to say the least....This is a crazy video I know...lol...but, I had to relay a message to the recipient of this GIFT, not to tear the brown paper, in hopes the "PRETTY WRAP", stays in tact underneath! Lol...I did up 12 "Clean and Simple" Cards as well! I'm amazed that I could do that! Hahaha I needed to place some cards in a GIFT BOX, just so they had some "EVERY OCCASION" Cards to go along with their present. It's amazing how you can turn out so many cards, in a short period of time, if you are stressed for time to get it mailed! I get so much INSPIRATION of "CLEAN and SIMPLE" cards, on STAMP NATION, where the DT showcase such beautiful cards! Thank you to my new subscriber.  Have a BLESSED weekend everyone!

Thursday 27 November 2014

Altered Lampshade Part 2 of 3...

Thank you for joining me today, as I am heading to the FINISH LINE of this Lampshade project! For you, my American friends, I pray you had a MEMORABLE DAY, with FAMILY, and FRIENDS! I love a Turkey meal with all the trimmings...mmmm, and let's not forget the Cranberries shaped like a can!!!...YUMMY! CHRISTmas is not far off, so I can wait for my GOBBLE GOBBLE then!

I am so excited to see I have another Subscriber....yay, I'm so pleased about you joining us! Welcome!
My tutorial this evening was mainly to show you, I'm working on it. I started filming, and half way through, I knocked the camera on the floor! I began again...lol...What's new, right?...haha. You will not believe the different direction I went after the camera shut off! I went in my Craft Closet,  to get out my trunk of  HOARDED TRIMS, LACES, FLOWERED LACES, and so much MORE!  I started holding things up to my lampshade, and that was it! I headed off into a total different direction! Oh, it's still Shabby Chic, and remains having a VICTORIAN flair to it......just headed down a different Creative Path....Oh, I am so pleased I changed direction too! See you tomorrow, for my COMPLETED GIFT, and labour of love for a friend! I hope you'll like it!

Wednesday 26 November 2014

One of the first cards I made, reminding me to REJOICE!

Happy Thankgiving to all my American friends. May we REJOICE together, whether in Canada, or the USA, we have so much to be THANKFUL for! As we bow in PRAYER, and give THANKS for the bountiful BLESSINGS God has given us, let US remember to pray for our Soldier's, their families, that gather TOGETHER, with an empty chair beside them, because their loved ones are off protecting us this very day! REJOICE in the Lord alway, and again I say, REJOICE!

Altered Lampshade Part 1 of 3 ....WRAPPING IT UP!

Thank you for joining me today, as we COMPLETE this CHRISTmas gift together! I'm sharing each stage in 10 minute sections, so you can see the COMPLETION in little bitty stages....I may not be able to edit, but I do know when to shut my camera off!...lol..lol...See you on Part 2 next!

Tuesday 25 November 2014

Preparation to ALTER this pretty LAMPSHADE

Thanks for joining me, as I prepare to Alter this Lampshade tomorrow! I've picked out my supplies, fabric, embellishments, and a few surprises! I can't wait to COMPLETE this project TOMORROW...smiles This will be fun to make, and I'm looking forward to the ALTERING PROCESS to begin! See you tomorrow, Lord Willing, and me able! BLESSINGS

Monday 24 November 2014

COMPLETED Altered Sewing Heart Box

Thank you for dropping by my Craft Room to see the Sewing /Altered Box COMPLETED! Please ENJOY!

Sunday 23 November 2014

Altered Heart Box

Thanks for joining me in my Craft Room for my three piece altering CHRISTmas gift. Although this heart box lid I'm putting together is like watching paint dry, I had fun making it! Enjoy my friend....if you can stay awake! Lol

Saturday 22 November 2014

Small Haul, and the start of some Altered Boxes, and matching Lampshades

Thank you for joining me in my Craft Room today! Here are a few Orders that arrived yesterday, and the start of some CHRISTmas Gifts. I decided to do some Altered Boxes, and a Lamp shade to match! Enjoy!

Thursday 20 November 2014

One Layer CHRISTmas Cards with Perfect Pearls

Thank you for joining me in my Craft Room. These are Perfect Pearls One Layer CHRISTmas Cards. I think there is nothing as pretty, than a Perfect Pearls multi coloured card on Black CARDSTOCK! I had to take out all the colour's, and make a few ONE LAYER cards for CHRISTmas! I seldom make one layer cards for some reason! I absolutely love them, but I lean towards layers. The more paper on CARDSTOCK, the happier I am...lol....Enjoy!

#600 Video's in two years! That's not counting all the RETAKES...LOL Perfect PearlsTags

Thank you once again for joining me in my Craft Room. I was looking at my Video Count that posts each time I go to my site, and this video is number 600! In two years of taping my crafts, this makes 600 video's! WOW, that is truly amazing to me! 600 video takes, when you add in all the retakes, this could be 5000!!!!!hahaha. Anywho, I'd like to thank everyone that has viewed even One of the 600 video's. This 600th video is using my Perfect Pearls, and making cute little CHRISTmas Tags. You should see how much I was able to get out of one 81/2 x 11 piece of card stock....lol...I hope you enjoy #600!!!!!

Wednesday 19 November 2014

How to Recess a card to add an ornament, and lots of metal embellishments....

Thanks for joining me for the video portion of this card. The camera ended a tad too soon, not showing the Medal Art I used around the card. I added Gold thread, RIC RAK to make that tiny bow by the silver enamel dots on top of the inside card.  I used tiny pearls all around as well! If you have any questions about something you didn't see, please comment, and I'll answer them for you! Enjoy!

3D Medal Glitter Star Banner piece I turned into a cut out CHRISTmas Card. The video will be uploaded soon. Here are a few angles of this pretty card, so you can see the depth of this gorgeous star!


The inside, outside, and backside of my Birthday Card


How I store, and organize my spray colours for easy access!

Thanks for joining me today! Here is a video which I share some tips on how I store my sprays, and how to keep a filing system that shows the colour, name, and number to find them! A brief look at the books I chose to start building my Art Journal! Plus, a little find at my Thrift Store for a dollar! Smiles Enjoy!

Monday 17 November 2014

Part 2 of 2... Masking without having to FUSSY CUT! Yay

Thank you for sticking with me here...lol..It took 4 hours for this video to upload! Phew! I found my teal balloon on top of the ink, which I put away...lol...I added Wink of Stella to the green balloon, and to just the alphebet letters on each of the balloons on each side. The Palm leaves received a light dose of WOS to add a hint of sparkle. I'm so excited, I can hardly stand it...ANOTHER SUBSCRIBER?...YAY, THANKS SO MUCH FOR JOINING. I AM SO ANXIOUS TO SEE IF I CAN REACH 100!!! I will have a huge GIVEAWAY when that day happens...It may be soon...wahoo! Tomorrow I will create a great envelope, and show the cute inside of this Birthday Card! Thanks to each SUBSCRIBER!

This is the FINISHED card, with a few inside the card surprises! I will display it on Part 2


Masking Technique, without fussy cutting!

Thank you for joining me today! This is a 2 part video. I really tried my best to make it one, but I wanted to add a few more cute techniques before I called it a card! Yay, I have another subscriber! I'm so excited about that! Thank you so much everyone! I am not going to say much about this tutorial, because I think you'll really enjoy Part 2, and the fun elements I added to make this FUN, COLOURFUL BIRTHDAY CARD! Enjoy!

Saturday 15 November 2014

Inexpensive Powder Idea's for Embossing


Thanks for dropping by my Craft Room! I thought I would share a few ways to save on Embossing Powders. I love my embossing powders I have purchased, but the one using just dollar store Baby Powder was terrific! I will reach for the Baby Powder, now that I've tested it along side my store bought powder! Both products really work well, and smell wonderful while your creating a project! I hope you find these idea's useful! Thanks

Nail Art for Nails, and your SHAKER CARDS!

Thank you for joining me in my Craft Room. Yay, a new Subscriber! I will have a WONDERFUL GIVEAWAY when I reach 100! Today's tutorial was done for my friend CAROLYN S. She asked me to share what COLOR, and BRAND of nail polish I use on my tutorials....smile! I didn't want to forget to mention it when doing a tutorial, so CAROLYN.....this video is dedicated to you my friend! Enjoy! P.S. For those that love to experiment with nail glitter, on your nails, or in your Shaker Cards, I hope this video brings a SMILE to you too!

Thursday 13 November 2014

Mixed Media Fun on Water Color Paper...Using Homemade Texture Paste

Thanks for joining me in my craft room! Thank you to my new subscriber...YAY, how exciting? I decided to take out my home made texture paste, to show how wonderful the texture is! It dries quickly, and remains white! I tested my Tim Holtz Distress Sprays for the first time, and I rate it a big thumbs up! Love the brilliant color! Thanks to all my subscriber's! I appreciate you viewing my video's. Have a blessed evening! See you on the next video! Smile

Thank you

Thank you is my video for today! To my friends, both deaf, and hearing....THANK YOU for your support, and kind comments. To CATHERINE Pooler on her Site STAMP NATION, a hearty thank you, for your kind welcome, and friendship! See you on my next video friends!

Wednesday 12 November 2014

WOBBLE CARD COMPLETED...My shortest video to date!

Here is my WOBBLE CARD COMPLETED! The shortest video to date!...lol...lol...! I hope you like it!

WOBBLE Snowman Card

Thank you for joining me in my Craft Room today. Here is the card I recreated from a a stamp I saw on another Blog, but did not own. I used the adorable "WOBBLE" to make my presents do just that, WOBBLE"! Smile....I made a short, and I mean "SHORT" video to show you the COMPLETED WOBBLE CARD! It will be uploaded shortly. Enjoy!

How to take a stamp you like, but don't own, and recreate it with the stands you do have! My video, which is uploading, will show you how easy this is to do! Here is the recreated WOBBLE card, that I made today! The presents WOBBLE in the Snowman's arms! Turn a plain card, into something WOBBLEous!


Saturday 8 November 2014

Emboss Resist CHRISTmas Card using my Peerless Watercolour Set, Gold MM Paste, and Gold Stickle's ....


Emboss Resist with Peerless Watercolors

Thank you for joining me in my craft room this evening. I wanted to do an Emboss Resist using my Peerless Watercolor's. I didn't have enough time at the end, so I will post the finished Christmas Card next for you to see what was added to make this stand out beautifully on the two different Stampin Up Card Stock choices. I used Stickles, and some gold mixed media paste for on the tree. Thank you once again for dropping by. God Bless

My granddaughter Olivia made this card in awareness of those battling with CANCER....HEY, it's going to be O-K


Friday 7 November 2014

Shaker Cards using Penny Black Fawn Die

Thank you for joining me tonight in my Craft Room. I had so much fun making these two Shaker Cards this afternoon. I had a request to make the card, then do another one showing how it was created. It took me the same amount of time putting it together though. I had so much of it prepared ahead of time, and still I went the full time. LOL I couldn't edit, or you would miss some of the process of putting together all the pieces parts. hahaha I hope you enjoyed it anyway. I am working on some speedy video's in the future. If you have any questions, just leave me a comment. Have a great weekend. God Bless

Thursday 6 November 2014

Heartfelt Creations Order arrived, and a quick 20 minute shop at Michael's

Thanks for dropping by my Craft Room this evening. I'm getting my CHRISTmas Cards prepared, and ready to video tape. I am going to try and EDIT each one, keeping the video between 5-10 minutes each. The techniques I have chosen are quick, clean, and easy cards. I think you will enjoy each technique, along with stamp sets you can substitute for similar sets you may have in your stash! Smiles.....See you tomorrow my friends! Enjoy today's HAUL!

Tuesday 4 November 2014

COMPLETED COPIC CARD ......plus matching envelope. Part 3 of 3

Thank you for joining me in my Craft Room! I am thrilled to finally finish this card, and envelope for you this evening! I am so please that it fit in the envelope as well!..lol..lol...I really have to take the time I need to edit my video's, so they are not full screen movies! Hahaha....I should supply popcorn to all my subscriber's...smiles. I have gained 2 new subscriber's in the last week or so! I'm soooo happy about that. Welcome to my Blog! I just downloaded a book to read on " How to make your Blog interesting", something like that..lol...It has information on building a Blog, and how to basically build a great, and interesting Blog. I started my Blog just over 2 years ago, and did not know a thing about BLOGGING! I just wanted to share some of my interests with other crafting friends, and here I am, still plugging away! Smile I'd love to learn how, or where you go on the Internet to download product names, the stores, etc. under my video's, when I learn how to edit properly! It takes my computer up to 4 hours to basically upload one video! Process video's are all I know how to do! I just turn the camera on, and craft! For me personally, I love watching process video's. On the other hand, I love " get to the point" video's, like Kristina Werner's Blog!...Who wouldn't like to know all the internet knowledge to build such an audience, and do it with class? I'm in awe of so many wonderful built Blogs I view regularly. Like yours Marie...yes, you have built a wonderful Blog! Well, I'm blessed to be this far with the TECHY knowledge my brain possesses...lol...I started out wanting to welcome my new subscriber's, then I apologize for my lengthy video's...lol..lol..Go figure! Welcome all my Blog friends that have stuck with me in this Crafting Journey! God Bless

COPIC CHRISTmas Card, plus Envelope....I die cut a hole in the envelope, so when you insert the card, the flowers are outside. Final Video Uploading. Enjoy!


Monday 3 November 2014

Signing Craft Video

Thanks for joining me again this evening. These video's I posted for my deaf friend, were requested to be placed on my Blog once again! Thank you to the deaf crafting community for your support! I will update a few more signed video's in the near future! God Bless!

Some requested Signing video's I did last year.

Thanks for joining me today! I have my Copic video Part 2 of 3 almost ready for my Blog. Yes, it turned into 3 parts, because of the envelope technique, and a very small HAUL! LOL....I had a fall last night, which tore my knee up, and the stones where I landed scraped my shins up quite a bit. I may be going for x-Rays tomorrow, because the stairs..yes, I said stairs...where I missed the steps, and fell in the stones, on my sons gravel lane way, has my wrists, which I broke last December, quite  swollen! We will play it by ear! Appreciate your prayers! My deaf girlfriend requested these video's I did last year, to be placed on my Blog again, for her. There you are Diane, hope you like them!

Signing a Vintage Card

Thank you for joining me in my Craft Room. I would like to Sign a Vintage Card, for all my Deaf, and Hearing Impaired friends. This is First of Three Video's I will Sign for you, each using a different Card Technique. I look forward to some feed back, to see if I was able to adequatey interprete this card for you to understand. I will be getting a family member to work the camera, so in the future I  can sign in a consistant manner, and make the card as well. God Bless You for your patience. Card 2 is downloading.

Sunday 2 November 2014

Pointsettia Card created by SCRATCH

Thank you so much for dropping by today! Here is a card I made without a die, just my scissors, and red card stock! Pointsettia's are simply lovely images to make on CHRISTmas Cards. Recently I purchased two dies, to speed up the process!..lol...As I looked back at this card, cut out, shaped with baking styluses, and textured with iTune plastic cards....I think the simple creations, before we had dies, fancy machines, texture plates,  made me appreciate the days gone by! The leaves were cut, and textured with my iTune plastic card. It made me proud to know it's not the fancy machines that make our cards special. Creativity finds the simple things, like scissor's, white glue, and paper, plastic cards, and our imagination, and makes the process fun!....Oh, we've come a long way, AWAY from the simple cutting, folding, and finishing in a jiffy! Yes, my friends, my baking Fondant Stylus Kit worked wonders on the petal's, and leaves! Please enjoy! I'll post a die cut Pointsettia Card, and compare the two! Smiles What do you think? Old School, or New? Luv to know!

Friday 31 October 2014

CHRISTmas Memories


Here is a card I created back in 2012 using the braided ribbon technique. I'm dropping by to let you know my day was so busy, it was impossible to complete the finishing touches of my Copic Tutorial. I am all prepared however to have it posted Monday morning. You will enjoy some of the different ways I made textures. The matching envelope is very unique as well. I look forward to seeing you Monday! Thank you for your understanding. I'm heading to Erie PA to a Ladies Conference tomorrow. I am excited to see so many friends there, and enjoy a luncheon too! God Bless, and I'll see you Monday!

Thursday 30 October 2014

Copic Coloring...Adding texture to large stamped images. Part 1 of 2 Completion of Card, including the Envelope will be in part 2 tomorrow!

Thanks for joining me today. I was asked to do some Copic video's, with some of the techniques I use on different stamped images. I said I would love to do that! Here is video one, of a series of video's I will do in the next week. The downloading of each video takes so long, but I will try and get one out each day. Thanks ever so much for your sweet comments, and subscribing to my Blog. I wanted to let you know that this is the beginning stage of the START to FINISH Card. I will be showing how to pick colours for your card construction.  I'm going to finish the skirt with much more colouring with Copic's, to ad shading, and textures, so the skirt looks like she's TWIRLING...smiles. We will spray our paper flowers to match her dress, and the final WOW FACTOR will surprise you. We have the skin tones, and my favourite part of colouring "the HAIR"! I think you will luv the end result! I've included a matching envelope with a cool addition I think will surprise you!  See you in the morning!

Wednesday 29 October 2014

A Distress Haul, plus a little more.

Thanks for joining me in my Craft Room. Well, I have a bad flu bug, and Strep throat, and still managed to get some bargains! There is something about the word SALE, that reels me in every time!..lol..I am preparing for winter, and that means settling in my Craft Room and actually using the things I buy. The only purchase I am waiting for is a 72 set of Derwent Inktense Pencils, and a set of 15 Avery Elle Pigment Inks, that I can't wait to use. These are new, and dry quicker than other Pigment Inks, which is awesome. The colours are absolutely stunning, and vibrant. I have a 25 set of Derwent Inktense Pencils, but I loved all the other colours that were in the extended set, so I splurged. Haha....I bought the Inktense blocks some time ago, and they are wonderful to use! I'm getting my CHRISTmas Cards ready to create, and that will keep me busy. I'd like to extend a thank you to all my subscribers. God Bless

Thursday 23 October 2014

One GORJUS Haul

Thank you for joining me in my Craft Room. I really had a wonderful vacation, but it's good to be home after 16 days away. I had this order delivered on Tuesday, and finally decided to open it today. These GORJUS STAMPS, with MATCHING PAPERS, are by far one of the nicest stamped images for colouring, and matching up with their own paper line, that I have purchaced thus far. The packaging is astoundingly beautiful, the quality is amazing, and the price is affordably delicious....SMILES. I was so smitten with the colouring images, I had to order all of the GORJUS PRODUCTS for my crafting pleasure. Some of the sets are on back order, as well as the matching papers. I look forward to the wonderful cards they will produce. I will see you on the next card creation, as I colour them with my Copics! Thanks for dropping by!

Sunday 12 October 2014

Copic Coloring is AMAZING FUN!

Welcome to my Copic Practice Sessions. Smiles...I fell in love with Copic markers a year ago, and haven't put them down since! I'm amazed at the gentle ease of taking a marker, and creating such vibrant colors before my very eyes. There is so much learning that goes into this art form, but I find it  soothing, whether it turns out the way I vision it, or it doesn't! Like anything we persue as a hobby, practice is required to perfect your technique, so I keep plugging away! Smile.... I enjoy watching many Copic artist's, showing their ability to take a blank stamped image, and turn it into a piece of colourful Art! Patience is a key character trait I  need while learning to master the Copic marker! As a beginner, I'm learning to except my own individual style of coloring with my COPIC'S. When I first started coloring with these remarkable markers, I found myself trying to immulate other artist's abilities, instead of incorporating their technique's into my own individual style. When I realized I had my own vision of coloring, and my own style, was I able to move forward, without becoming insecure in my work. I encourage you to become relaxed with your own style, and enjoy the experience of gleaning from other great Copic Colorist's, and their awesome technique's. I hesitate to show practice sheets on video, knowing I'm a beginner., but hey, that's where we start right, at the beginning? Have fun with these amazing markers!

Copic Texture Technique on animals

Thank you for joining me in my Craft Room today! I'm away visiting family, but I did bring along my Copic's to practice with!...lol. I've been doing animals lately, trying to develope some different textures. The camera shut off however before I was completely finished. I apologize for that. The next video I'm uploading will show the final results. One thing about COPIC'S I've learned from Sandy Allnock during class was the numbering system, and how it works on understanding your markers when colouring. It wasn't a clear explanation on the video...lol...but, I will try and explain it on here for you to better understand what I was trying to say on the video. Smile

The letter tells us the colour family
The first number tells us the SATURATION of the marker. Example: The LOWER the number the more PURE and VIBRANT the color. The HIGHER the number the less SATURATED and TONED DOWN the color appears.
The second number indicates the COLOR SHADE. LOWER numbers indicate LIGHTER SHADES, and HIGHER numbers indicate DARKER SHADES.

See you on the next video! Thanks to those friends checking in to see if I disappeared! Smiles


Friday 3 October 2014

New Copic Air Compressor joined by a wee HAUL

Thanks for joining me today in my Craft Room. I know I've not been crafting as usual, but that will change as soon as I get back from vacation. I am back to retirement as of today, and a thousand projects are awaiting my return. I have all sorts of new techniques using products I have sitting around waiting to be used again. One is CHALK painted card fronts. I have so many chalk sets, I had to discover new ways to use then...I did, and can hardly wait to show you! Copic Colouring 101 will begin soon. I want to explore various techniques, and how to illustrate them on card settings. I've been practicing with my COPIC'S, so I can share some fun ways to use them. Another craft idea are coasters for Christmas gifts, using Alcohol Inks, smooth tiles, and felt. Wonderful gift idea's, at affordable prices will be on my list of tutorials! Thanks for your encouragement, and I'll see you n my next video.

Saturday 27 September 2014

Practicing with my Copic's 2

Thanks for joining me in my Craft Room. I am finishing this image to make a Vintage Card, which is currently uploading.

Practicing my Copics

Thank you so much for joining me in my Craft Room today. I decided to film this image as I was practicing with my Copics. I made a card from this image, that I will post later. Thanks for dropping by.

Thursday 25 September 2014

An Explosion Box in a Box....Part 2 of 3

Welcome to my craft room today! Here is the second portion of this video, showing my version of an Explosion Box in a Box. I hope you will enjoy the process with me. I'm going to show you some pics of the actual Box, on the inside. I have to move swiftly on this project, because I'm giving its to my friend, for her daughter that is turning 18 on Saturday. I will download the finished video in the morning. Thank you for viewing the process with me, even though it is very slow going!...lol

Wednesday 24 September 2014

Explosion Box in a Box, and small haul

Thanks for dropping by my Craft Room! I'm going to make an explosion box, in a box. My friend's daughter turns 18 on Saturday, and I thought this would be different for her to open, instead of a card...lol..I've never done one like this, and I want to design it with my own personality, and design, so it will be in 2 or 3 parts to complete. Hope you don't mind the length of it, but I promise the results will be pretty. I also received a small haul, and I'm going to compare the new Michael's 110 lb. Cardstock with others I have. Please Enjoy!

Tuesday 23 September 2014

Fun Shopping Day, and a few Order's have arrived!

Welcome to my Craft Room today! It has been awhile since I've been in my Craft Room, since going back to work. Five days left, and I'm back to my RETIREMENT STATIS...lol...I was off today, so I decided to go shopping...fancy that!...haha...An order from Ellen Hutson arrived today as well, so I thought I'd show you what I received. I also bought 2, 110lb. White CARDSTOCK from Michael's that everyone seems to like. I forgot to get them out and show you. I will try them on a card to see what I think of the weight. I was watching a few video's, and the person's using it, had great reviews. I will try it tomorrow. I also received some beautiful THANKYOU ribbon in the order box from Ellen, for placing my order. It was nicely packaged, with a pretty note! Please enjoy this HAUL, and I'll see you on the Explosion Box Project I'm starting tomorrow. Enjoy your week!